Green Glue Exposed: The Secret Ingredient for Superior Soundproofing
22/10/2024
Using Green Glue is straightforward and doesn't require any special tools or expertise. This ease of use makes it a popular choice for both professionals and DIY enthusiasts. Regardless of whether you are soundproofing a home theatre or recording studio or simply want a quieter home, Green Glue offers a practical option. By incorporating this secret ingredient into your soundproofing plan, you can achieve much better results with less effort.
What Is Green Glue?
Composition and Properties
Green Glue is a unique damping compound made from a polymer-based substance.
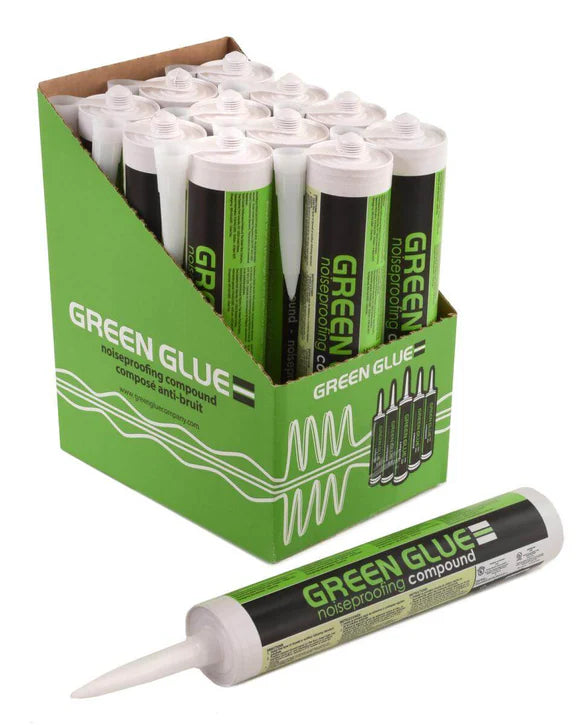
It comes in a thick, gel-like form, making it easy to apply between layers of construction materials like plasterboard or plywood. The compound is intended to remain flexible even after it cures, which is key to its soundproofing capabilities. One of the standout properties of Green Glue is its ability to transform sound energy into minuscule amounts of heat. Since it doesn't dry hard, it continues to dampen vibrations successfully as time passes.
How It Works for Soundproofing
Green Glue works by damping sound vibrations before they can travel through walls or floors. When acoustic waves hit a surface treated with Green Glue, the compound converts the vibrations into heat, which dissipates harmlessly. This process reduces the amount of sound that passes through the treated surface, making rooms quieter.
To use Green Glue, you apply it between two layers of plasterboard or other building materials. The compound works best when applied in a zigzag pattern to ensure even coverage. As sound travels through the wall, it hits the Green Glue layer, which disrupts its path and significantly lowers the volume of noise that emerges on the other side. This simple yet successful method makes Green Glue a go-to option for soundproofing projects.
Benefits of Using Green Glue for Soundproofing
Noise Reduction Capabilities
Green Glue excels in reducing noise, making it an excellent choice for both residential and commercial spaces. Its ability to convert sound vibrations into heat means that less noise travels through walls and floors. This is especially helpful in settings where noise control is critical, including home offices, bedrooms, and recording studios. By dampening a broad selection of frequencies, Green Glue ensures that both high and low-pitched sounds are subdued, leading to a calmer environment.
Another advantage is that it reduces flanking noise, which is sound that travels around barriers rather than through them. For example, noise might travel through the gap between a wall and the floor. Green Glue helps seal these gaps, thus further enhancing its reducing noise capabilities.
Practical Advantages in Home and Studio Settings
For home use, Green Glue offers a practical solution to everyday noise problems. Whether you want a quieter bedroom or a more private home office, applying Green Glue can make a noticeable difference. It's also well suited to home theatres, where reducing sound transmission ensures the best audio experience without disturbing others in the house.
In studio settings, Green Glue is invaluable. Musicians, podcasters, and producers require a quiet environment to work successfully. By using Green Glue, studios can prevent outside noise from interfering with recordings and keep loud music or sounds from bothering neighbouring rooms. Its easy application makes it a preferred choice for both new constructions and renovations, offering flexibility and efficiency in soundproofing.
How to Apply Green Glue
Step-by-Step Application Process
Applying Green Glue is a straightforward process that even a novice can handle. Here's a step-by-step guide:
1. Prepare the Surface: Ensure that the surfaces you are applying Green Glue to are clean and dry. You will need two layers of plasterboard or other materials.
2. Apply the Green Glue: Use a standard caulking gun to apply Green Glue. Apply 2-3 tubes per 4x8 sheet of plasterboard for optimal performance. Spread the glue in a random, zigzag pattern to ensure even coverage.
3. Mount the Second Layer: After applying the Green Glue, immediately mount the second layer of plasterboard. Press firmly to ensure good contact, but there's no need to wait for the glue to dry.
4. Seal the Edges: It's important to seal the edges and any gaps with acoustic sealant to prevent sound leakage.
Common Mistakes to Avoid
Even though applying Green Glue is simple, some common mistakes can reduce its effectiveness:
1. Using Too Little Green Glue: Insufficient Green Glue will not provide optimal soundproofing. Always stick to the recommended amount of 2-3 tubes per sheet.
2. Waiting Too Long to Install the Second Layer: Once applied, Green Glue should be covered with the second layer immediately. Delaying this step can compromise its sound-damping properties.
3. Not Properly Sealing Edges: Any gaps or unsealed edges will allow sound to escape, reducing the efficiency of your soundproofing efforts.
Optimising Your Green Glue Use
Best Practices for Effective Soundproofing
For best soundproofing results with Green Glue, consider these practices:
1. Follow Application Guidelines: Always use the correct amount of Green Glue and apply it in a random, zigzag pattern for even coverage.
2. Use Multiple Layers: When possible, use multiple layers of plasterboard with Green Glue between them. This adds mass and enhances the soundproofing performance.
3. Seal all Gaps: Use acoustic sealant around the edges of your plasterboard and other joints to ensure there are no gaps for sound to escape through.
Complementary Acoustic Treatments for Maximum Results
To maximise the impact of Green Glue, use it alongside other acoustic treatments. Here are a few suggestions:
1. Acoustic Panels: Install acoustic panels to absorb sound within the room, reducing echo and enhancing audio quality.
2. Bass Traps: For rooms where bass frequencies are a challenge, bass traps can help manage low-end sound.
3. Door Seals and Acoustic Strips: Ensure doors are airtight with acoustic door seals and strips. This helps prevent sound from leaking in or out.
Conclusion
Green Glue offers an exceptional option for anyone looking to improve their soundproofing efforts. From its unique composition to its effective noise-reducing capabilities, this damping compound has proven to be a valuable asset in both home and studio settings. By following the proper application methods and avoiding common mistakes, you can achieve superior soundproofing with ease.
For maximum effectiveness, consider pairing Green Glue with complementary acoustic treatments like sound-absorbing panels and bass traps. This holistic approach will check that you create a perfectly soundproof environment.
Enhance your soundproofing efforts with high-quality acoustic foam products and materials from Advanced Acoustics. Explore our range today to find the perfect solutions for your needs.
Previous: Identifying and Fixing Acoustic Panel Installation Mistakes
Visit the Advanced Acoustics Ltd website for more information on Green Glue Exposed: The Secret Ingredient for Superior Soundproofing
ENQUIRY FORM